Input and running Gentrepid 
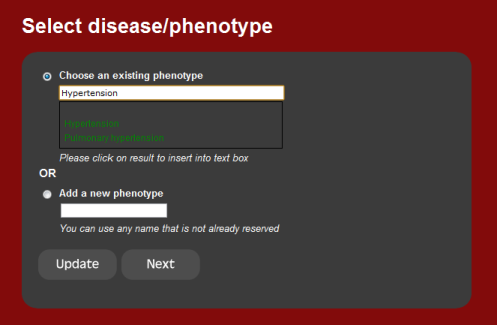
1. Phenotype or disease
The first step is to select a single phenotype or disease.
The current set of diseases are those curated from OMIM, but the user can
also input their own phenotype. Start typing a disease into the text box. If
the disease is present in the database, the drop down list will show it.
Otherwise, a new phenotype needs to be inserted.

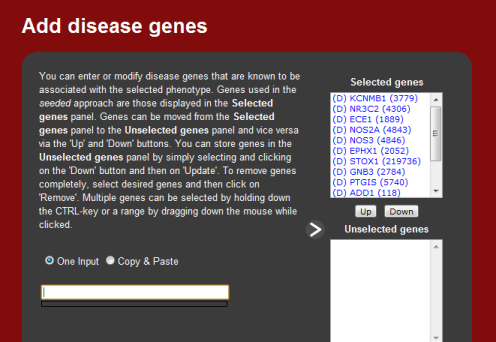
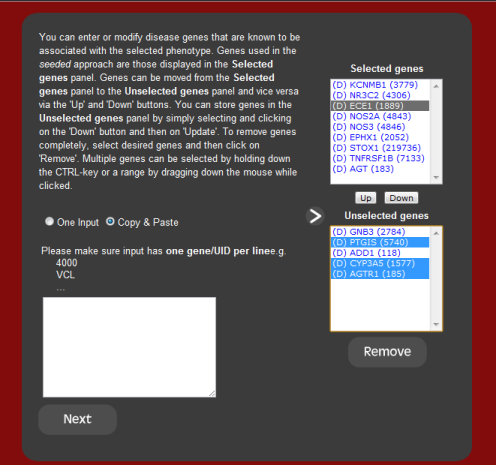
2. Associated genes
Once a phenotype or disease has been entered, the next screen allows the user
to modify the selected genes associated by that phenotype. These genes are
used as seeds for the predictions and can be modified by either removing genes
the user does not wish to the include in the analysis, or including genes that
the user wishes to use. This is useful for new phenotypes or for newly
implicated disease genes that have yet to be updated in the local database.
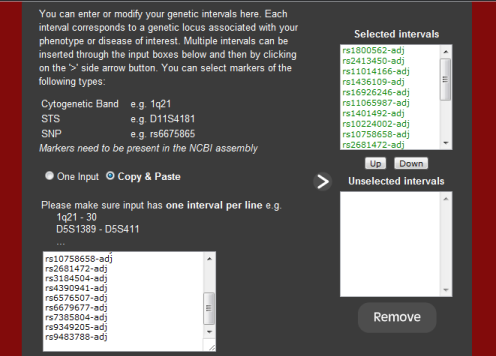
3. Genetic regions implicated
Genetic regions associated or implicated by the disease are required input.
Inputs can range from a single locus to multiple genetic loci. A locus can be
represented by a marker and either an interval surrounding this marker, a
second marker, or as a standalone. In the standalone instance, the adjacent
genes are selected as input. In the interval instances, genes within this
intervals are selected as input. Markers are represented as either single
nucleotide polymorphism (SNPs), cytogenic loci, or an STS band.

Multiple intervals can be inserted through the input boxes below and then by
clicking on the '>' side arrow button.
When inserting mulitple markers, it is required that the range be also
included. This means that a marker should be followed by a dash and either a
second marker, an interval size (in Mb) or the word 'adj' if the user wishes
to just look at adjacent genes.
Markers used in the analysis are those displayed in the 'Selected' panel. As
on the other pages, intervals or markers can be moved from the 'Selected'
panel to the 'Unselected' panel and vice versa via the 'Up' and 'Down'
buttons. You can store markers in
the 'Unselected' panel by simply selecting and clicking on the 'Down' button
and then on 'Update'. To remove markers completely, select desired markers and
then click on 'Remove'. Multiple can be selected by holding down the CTRL-key
or a range by dragging down the mouse while clicked.
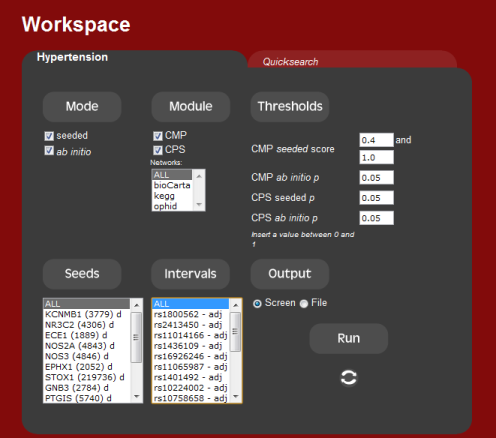
4. Running the system
Once all the input has been set, all that is left is to run the tool.
Click here to interpret predictions.
|